


Ejaad-Nama 0x11: Makers and Breakers
Ejaad-Nama (Urdu: Letters of Invention). We talk about lemons, acid batteries, and anything in between.

Ejaad-Nama is the word from the Urdu language which means Letters of Invention. Thanks a lot for the new folks who subscribed to my newsletter since the last issue. You are very much free to comment, criticize, contribute, call out, and so on. The feedback and discussion is what makes us both better.
If you still have not done so, you can do so here:
A couple of weeks ago, I wrote about Teardown Therapy: An activity on a lazy Sunday afternoon involving tearing down an old gadget that you have been hoarding because you thought you will use someday. The therapy worked more than I thought it would. While my 10-year-old nephew continued to ask some exploratory questions, I got to salvage a lot of parts for my future projects. One of them was a 14inch LCD Panel from an old laptop. You can read the full teardown fun here.

But our newsletter is about makers, and not breakers (*giggles*). You can take the maker out of the breaker, but you cannot take the breaker out of the maker. ( was that overdone?). Anyhow, the point is that usually when you have salvaged out the parts from the tear-down, it’s time to build-up.
The work desk in my room is getting cramped: There is a soldering station, small component boxes, a bench power supply, tools, wires, stationary, etc. Usually, if I am working on a project, I need a laptop to google things up like pinouts, or an ifixit website when I am repairing my iPhone for the 10th-effing time (3rd time to be accurate after replacing display twice and battery later, but hey, it still is going). Having a laptop on the desk reduces the work area drastically. I am sure you know what I mean.
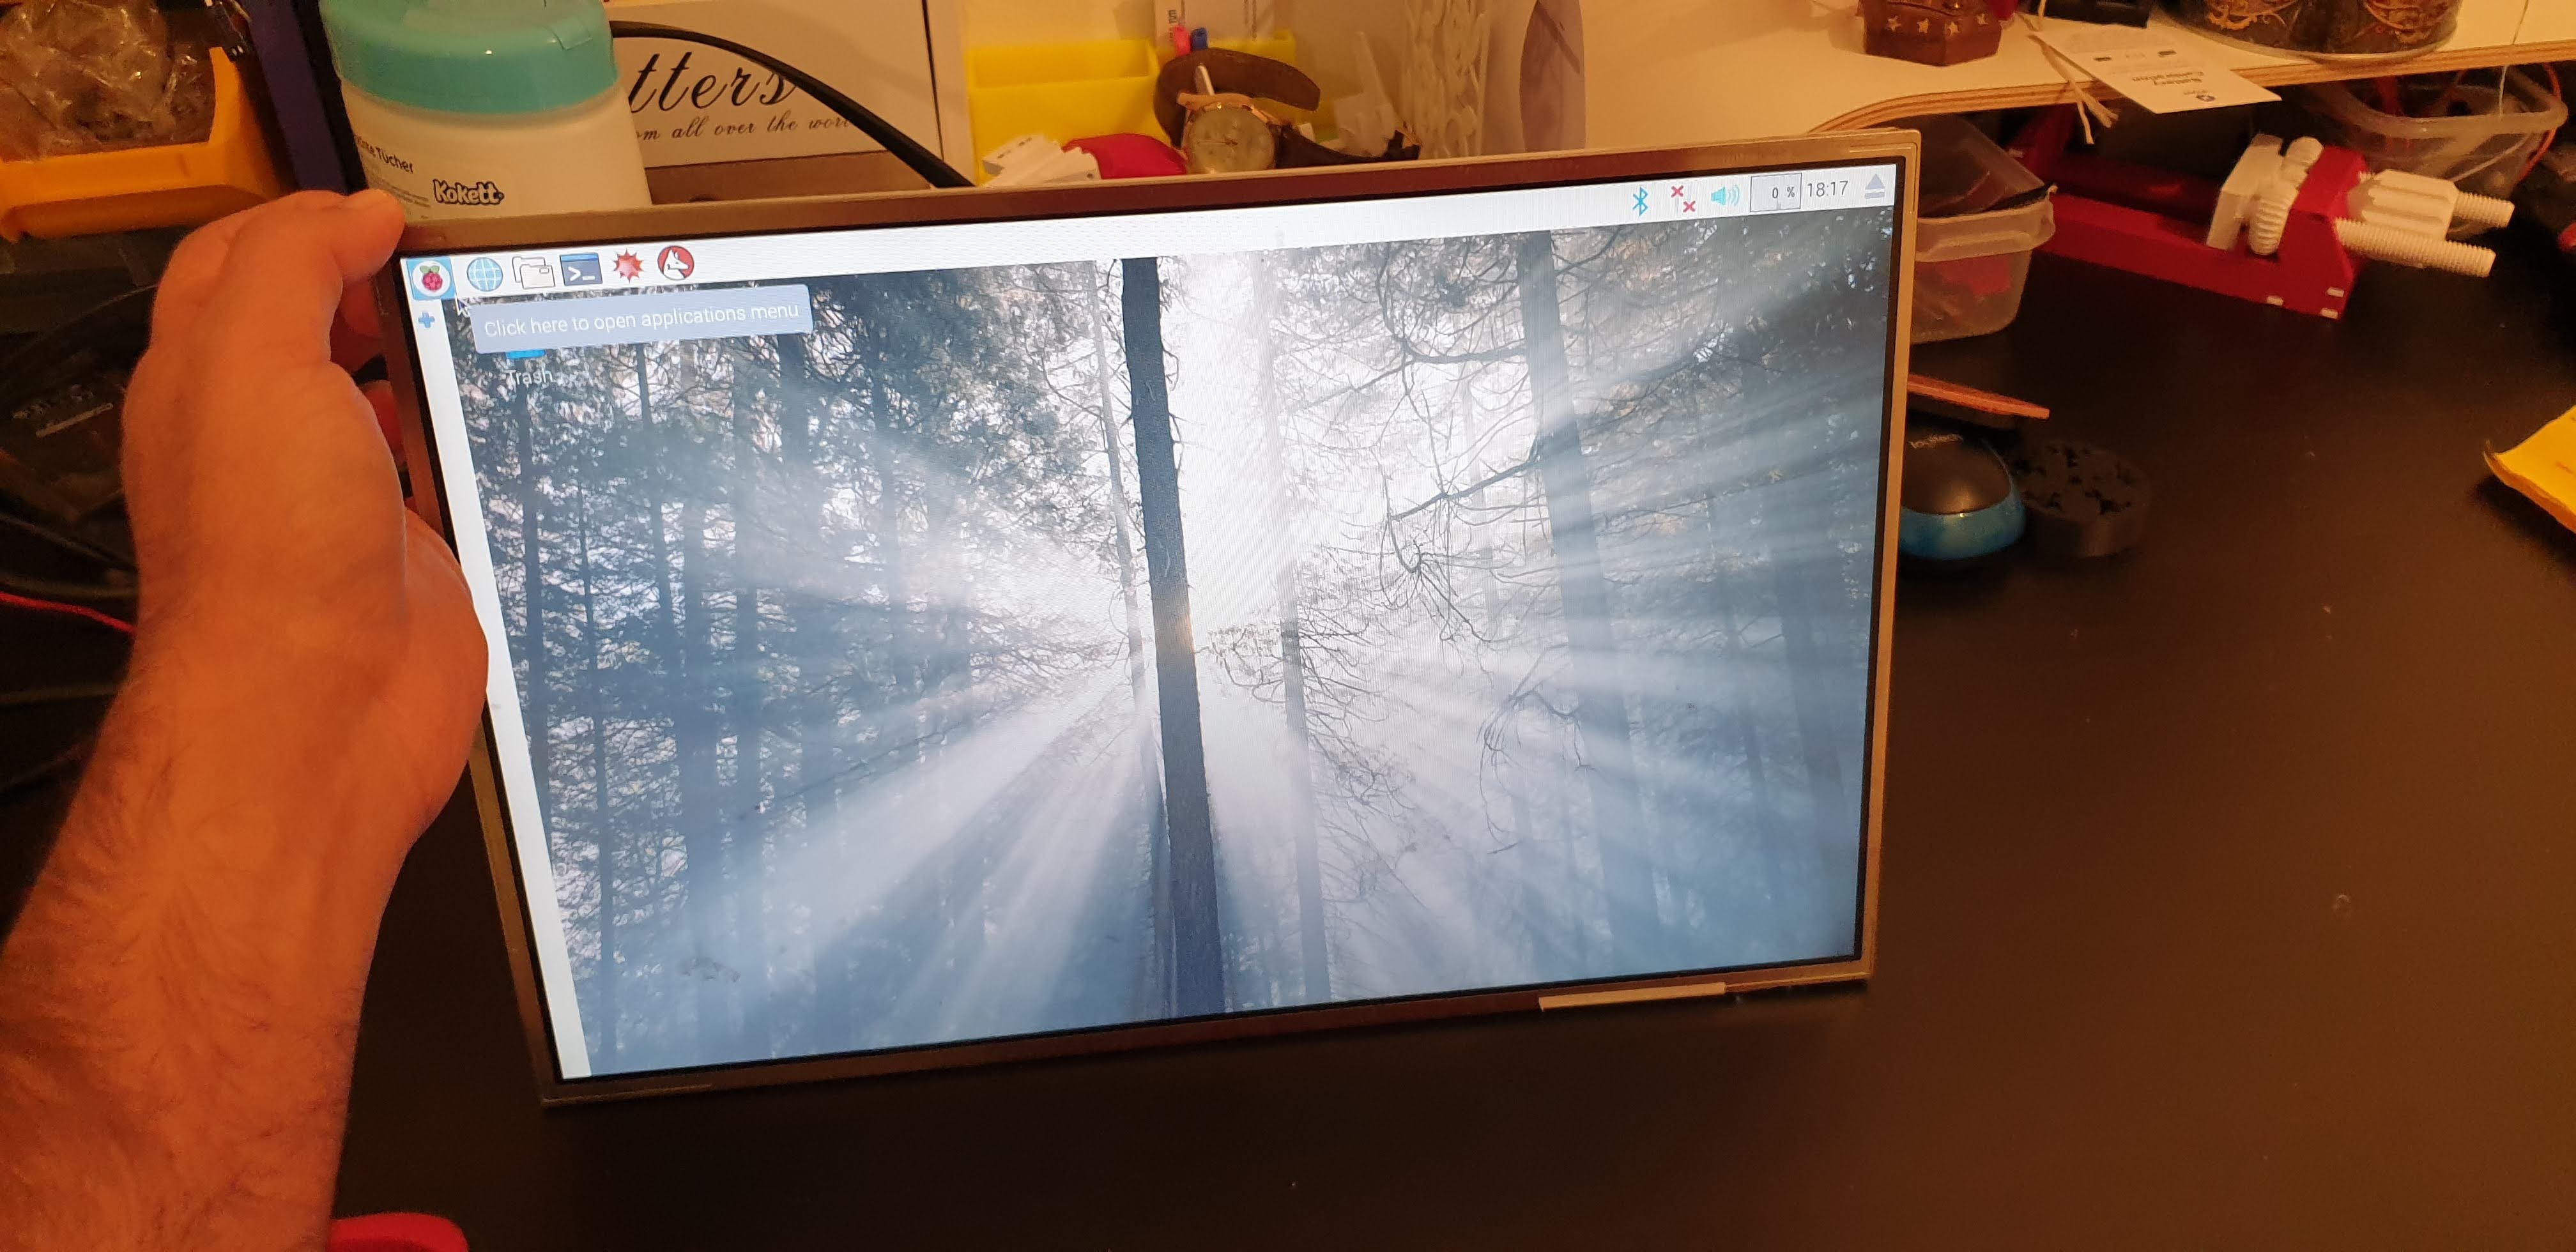
Hence, I have decided to use the LCD panel to hook it up with a raspberry pi and wireless mouse/keyboard. I would be mounting the whole setup on the wall that is against my workbench to save the precious working real estate on the desk. I can then open datasheets, or useful reference while I work. Oh, and I want to create a wooden frame to go with so that it can act as an art display when not working ;).
Connecting a laptop display to the raspberry pi has come a long way. It is pretty easy and relatively cheap to drive a laptop display with off-the-shelf components. Let me break down how it works:
(By the way, if you get bored reading the technical stuff below and think that life would have been better as an astronaut, you should know that they don’t get paid much. about 66K dollars if you start like NOW!)
LCD Display
An LCD consists of a lot of pixels. A pixel is a big sandwich of light source, polarizers, and liquid crystal. The liquid crystals in the center are controlled via voltage to allow or block the light coming from the light source (the backlight LEDs). The image is hyperlinked to the original article if you want to learn the detail.

To drive any display, you need to power the light source in the panel and the driver which controls/drives the liquid crystals. Usually, there is a number on the back of every LCD panel.
The number looks like this: LP154WX4(TL)(C8).
A little google later, you get to see what the numbers mean from the datasheet. LP is the manufacturer code for LG. 154 is the size: a 15.4 inch LCD. WX4 is a resolution of 800 x 1280. TL provides the information that it is TN type screen (not interesting at the moment) and it has 40 pins (important to order the right driver).

LCD Controller board
LCDs usually come with an LVDS interface. Low voltage differential signal interface are a bunch of twisted copper wires for high-speed communication. Since I wanted to connect it to a raspberry pi, I need something which translates the HDMI output of the RPI to LVDS signals. With the above knowledge of the LCD model number, you can go ahead and scur the internet (Nah, eBay would be enough) to find the right controller board that matches the inputs and outputs.
Backlight Driver
My LCD panel is very old and does not use LEDs as a backlight. The backlight circuit from the laptop consisted of a transformer and do not touch sign. From that, I gathered that it was a DC to AC inverter powering the cold cathode lamps of the backlight. You need 12V to power the backlight.
Once you have made all the connections, you are good to go. I used the bench supply just to measure the current. I measured at about max brightness, the LCD uses about 900mA of current. Hence, with 12 V adapter with a current of 4A would be enough for both raspberry pi and screen to function correctly. And possibly finding a wall wart of that wattage won’t be so difficult (I hope).
If you reached the end of the article somehow and still want to change your career to maybe a bit artsy stuff like a chef, remember that a chef at Buckingham Palace is paid just 22000 pounds a year.
Yeah! break before make then…
If you would like to send in your projects and hacks to be part of the newsletter, please do comment below, or email me: a.nadeem89@gmail.com. Leave your feedback in the comments about the content and share it with your people:
Very nice blog